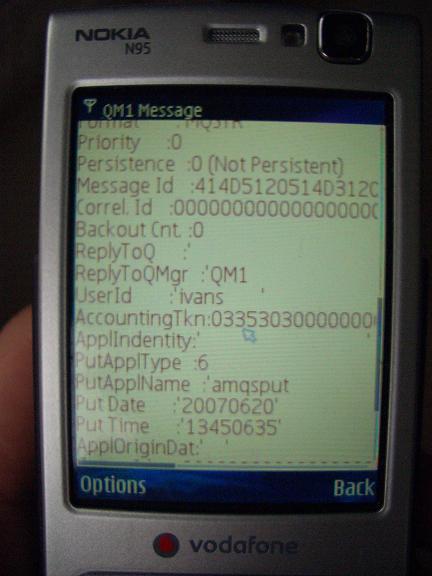
Assuming your phone has a browser, it is now possible to utilise the HTTP support in supportpac MO71 to view your WebSphere MQ queues, messages and more. The following blog entry gives an overview of MO71 HTTP support and simple instructions on accessing it from a web browser.
If you have never used or heard of MO71 before, it is Paul Clarke’s excellent WebSphere MQ GUI Administrator. It is free to download from the WebSphere MQ SupportPacs site. MO71 runs on Windows and comes with a large number of features allowing local and remote administration of queue managers across the platform range. New in V6.0.4 is HTTP support, which is the subject of this blog entry.
To install (or upgrade) MO71 is as easy as unzipping the download file. If upgrading from a previous version, as I was, all existing configuration data is saved. I had many locations (queue manager connections) already configured, but for new users you can get going quickly by connecting MO71 to a local queue manager, as follows:
- Start mqmonntp.exe
- From the main WebSphere MQ Administrator window click Menu->File->Add location.
- Enter the name of the local queue manager you wish to administer in both the ‘Location’ and ‘Queue manager’ fields.
- Click the Add button.
The queue manager should now show up in the list in the main WebSphere MQ Administrator window. To test the connection, right click on the queue manager and choose ‘Queue List’ to show the queues on the queue manager.
NOTE: Client connections are easy to configure in MO71, but local bindings connections are even easier.
Now we come onto using the HTTP support. By default the HTTP listener is not active so we need to enable it, as follows:
- From the main WebSphere MQ Administrator window click Menu->File->Preferences.
- From the main WebSphere MQ Administrator Preferences window select the HTTP tab.
- Ensure that the ‘Root Path’ field is set to the directory which contains the MO71 HTML files. NOTE: By default this should be set correctly, to the directory you unzipped MO71’s html files to ‘
<mo71 install path>\html‘. - Set the TCP/IP port field to a suitable value. I used 80, the default.
- Click the ‘Start’ button to start the HTTP listener. NOTE: There are more configuration options; I simply highlighted a couple of important ones.
Next we need to enable our queue manager for HTTP admin.
- From the main WebSphere MQ Administrator window right click on the queue manager you wish to enable for HTTP admin and choose ‘Open Location…’.
- From the Location Settings window select the ‘Options’ tab.
- Ensure that the ‘HTTP allowed’ checkbox is checked.
All the setup is now complete, although you may need to edit your firewall settings to allow access to the HTTP port (default 80). To test the connection, enter the following URL in a browser of your choice: http://<hostname>/mq/admin/Queues/<qmgr name>.
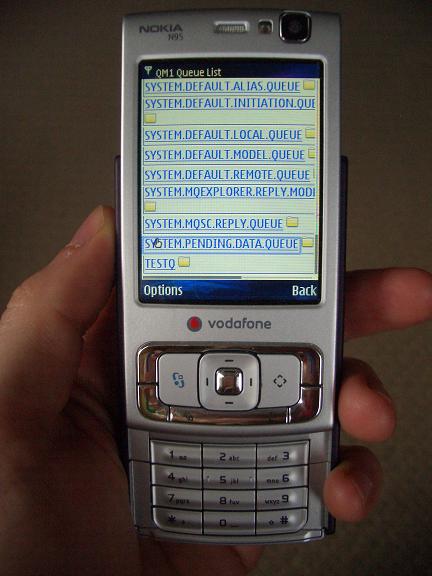
I entered http://myhost/mq/admin/Queues/QM1 into my phone browser which displayed a list of queues.
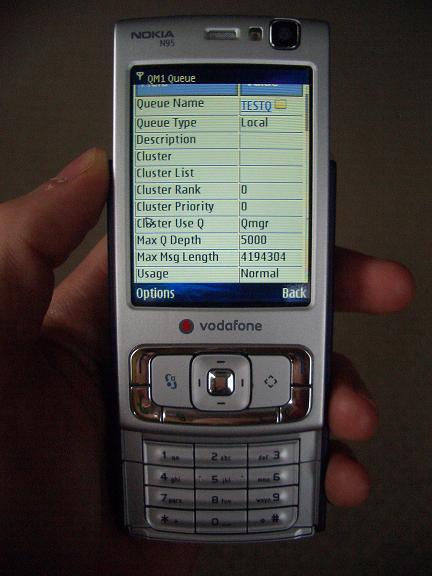
I then clicked on the queue name TESTQ which displays the TESTQ definition.
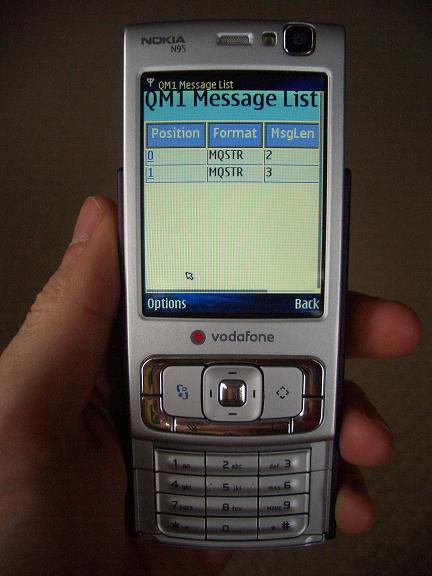
Next, I clicked back to show the queue list and then clicked on the icon next to TESTQ to display the messages on TESTQ.
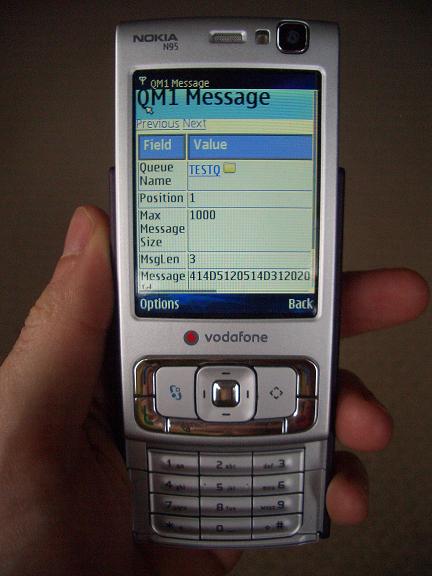
Then I clicked on a message number to display the message content and some basic message details.
Finally, in order to view a little more detail about the message MQMD, I went to the URL “http://myhost/mq/admin/msg/QM1/TESTQ?pos=0;mqmd;high” to display the message content and high level MQMD details of the first message on TESTQ.
As well as viewing queues and browsing messages, you can view other types of objects too. The HTTP features currently available are limited to basic read-only operations. I guess if there’s demand out there and Paul manages to find time, the HTTP feature set may expand. Although I used a regular HTML browser, MO71 can alternatively serve XML. And you can find lots more useful information on HTTP configuration in the MO71 manual.
Thanks go to Paul Clarke and Chris Law for their help in getting me going.

6 comments
Comments feed for this article
June 23, 2007 at 4:56 pm
Great post on MQMON (support pack) « betaalfa
[…] a Hursley view on WebSphere MQ blog, has an interesting post on the HTTP capabilities of the MQMON support […]
June 25, 2007 at 8:22 am
Andy Piper
This is very cool. I certainly need to play around with this 🙂
July 7, 2007 at 1:31 pm
FJ
Certainly cool. My first thought however was about security and potentially opening your pc to malicious attack and full control. And then the intruder could really play with a full fledged admin rights implementation of MO71….
July 9, 2007 at 7:30 am
Ian Vanstone
Security is a worry, which is a reason why this is currently “fun”. I (and probably others) have already fed back to Paul (author of MO71) on that point.
October 28, 2009 at 1:08 pm
jonysberg
Dear Publisher,
Do you know some documentation about how can i talk with Embed WebSphere MQ 6.1 from a java application? I would like getting the MQ capacity, queues and stats during a execution of a producer/consumer program. Is it possible ?
Best regards and congratulations about your blog !
Jonysberg.
June 6, 2011 at 7:32 am
Fun with WebSphere MQ and gadgets – Browsing queues from my phone - Websphere Tutorial
[…] good POST about Fun with WebSphere MQ and gadgets – Browsing queues from my phone: Assuming your phone has […]